The climbing season on Mt. Fuji runs roughly nine weeks a year, and most people who plan a climb don’t realise how short that window is until they’re already sitting in front of a reservation portal that is sold out for the date they wanted. The official 2026 dates are 1 July to 10 September for the Yoshida and Subashiri trails, and 10 July to 10 September for the Fujinomiya and Gotemba trails. Outside of those dates, the trails are not maintained, the huts are shuttered, and the upper mountain is genuinely lethal. Climbing during this very small window now also requires a paid reservation, a video safety briefing, a gear check at the trailhead, and an arrival time before 14:00 unless you’ve booked a hut. Plenty of people show up at the gate in trainers and a hoodie thinking they’ll buy a wristband on the spot, and they get turned around. So before anything else: read this entire guide before you book a flight that depends on summiting Mt. Fuji on a specific date.
In This Article
- What changed: the 2026 climbing-toll system
- Booking, step by step
- The four routes, ranked honestly
- Yoshida Trail (Yamanashi side)
- Subashiri Trail (Shizuoka side)
- Fujinomiya Trail (Shizuoka side)
- Gotemba Trail (Shizuoka side)
- Quick comparison
- When to climb (and when not to)
- Sunrise, sleep, and the mountain hut question
- Mountain huts: the reality
- Altitude sickness, recognition, and prevention
- Gear: what you actually need
- The descent (which is the actually hard part)
- What it costs, end to end
- Who shouldn’t climb Mt. Fuji
- The summit itself
- Getting to the trailheads
- Climbing in 2026: a planning checklist
What changed: the 2026 climbing-toll system
For decades, climbing Mt. Fuji was free and largely unregulated. From 2024 onwards, that started to change. As of 2026 (verified against the official portal at fujisan-climb.jp on 6 May 2026), every climber on every route now pays a flat ¥4,000 entry fee, must complete an online registration, must watch a roughly seven-minute safety video and pass a short quiz, and must arrive at the trailhead with the right kit or be turned back. The aim is to deal with two problems the mountain has accumulated: bullet climbers ascending overnight without sleep, and travellers showing up in white sneakers with a single bottle of water who then get hypothermic at the 8th station and need rescuing.
The Yoshida trail, by far the busiest, has the strictest rules. There is a daily cap of 4,000 climbers. The trailhead gate closes from 14:00 to 03:00 the next morning. If you have a confirmed mountain hut reservation, you can pass through the gate at any time, and you don’t count against the daily cap. Up to 3,000 of the daily slots can be reserved online in advance, and the remaining 1,000 are kept as walk-up quota at the trailhead. Cancellations are not refunded after the day-after-payment cutoff, and you cannot change the number of people in a booking once it’s made. On the Shizuoka side (Subashiri, Gotemba, Fujinomiya), the ¥4,000 fee and the safety briefing both apply, but there’s no daily cap, and the 14:00–03:00 gate closure is enforced via the FUJI NAVI smartphone app rather than a physical gate.
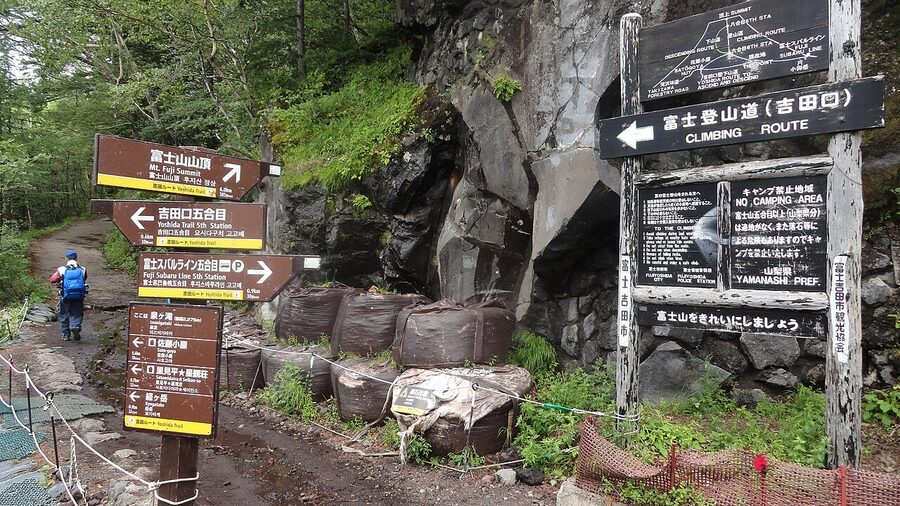
The Yoshida-trail mandatory equipment check is real. Rangers at the gate (informally called Fujisan rangers) will turn you back if you don’t have proper trekking shoes, cold-weather clothing, and a separate-piece rain jacket and trousers. Cotton hoodies, ponchos, and trainers do not pass. I’ve watched this happen at the Subaru Line 5th Station in person and the rangers are polite but firm.
Booking, step by step
For Yoshida (Yamanashi prefecture): book on the official portal at fujisan-climb.jp, pay the ¥4,000, watch the video and answer the quiz. You’ll receive a QR code. At the 5th Station you scan it and get a wristband. Done. For Subashiri, Gotemba, and Fujinomiya (Shizuoka prefecture): the registration runs through the Shizuoka FUJI NAVI app, with the same fee, video, and QR-code-to-wristband flow. The Yoshida system can also be done same-day at the trailhead window when there’s space, but in practice the queue can be 90 minutes on weekends. Book in advance.
The four routes, ranked honestly
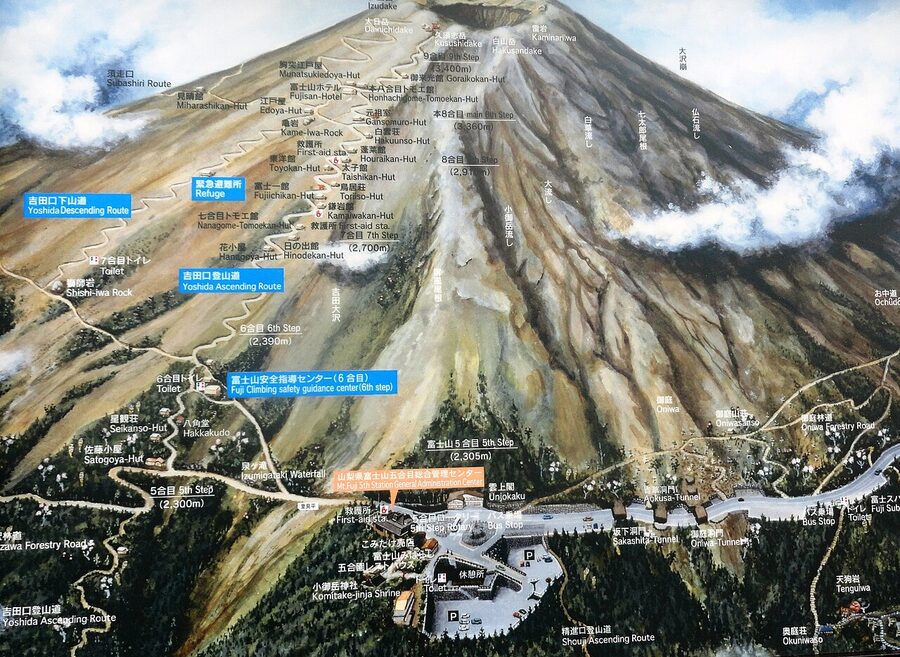
There are four routes to the summit, each starting from a different 5th Station. People who haven’t researched the climb tend to assume Yoshida is the obvious choice because it’s the most popular. It isn’t always. Here’s what each one is actually like.
Yoshida Trail (Yamanashi side)
Start altitude 2,300 m. Ascent 5–7 hours. Descent 3–5 hours. Daily cap 4,000.
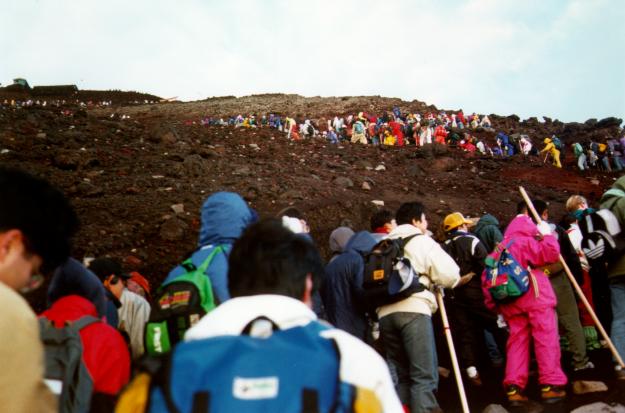
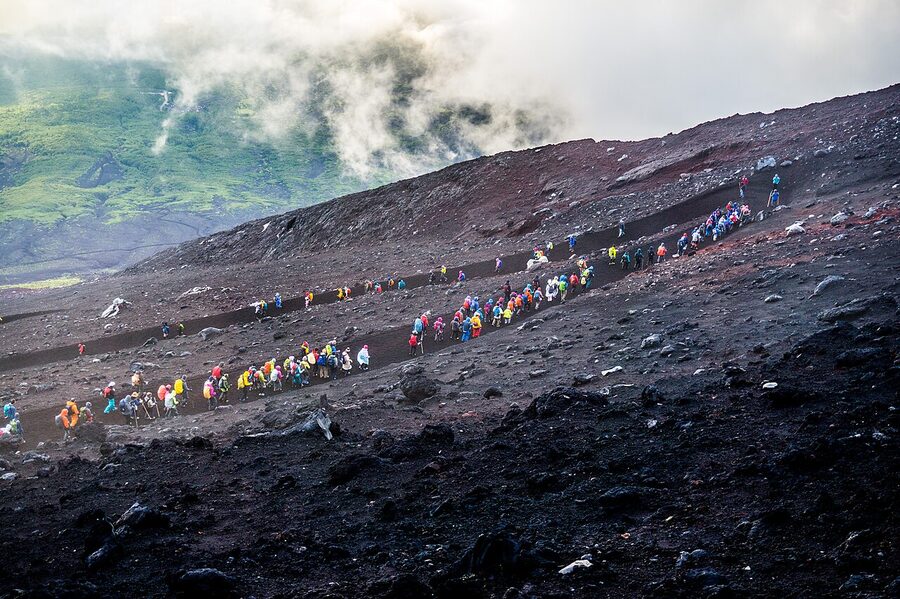
The default. The Subaru Line 5th Station is the easiest base to reach from Tokyo (one direct bus from Shinjuku, around ¥3,500–4,000 each way and roughly 2 hours 30 minutes). It has the most mountain huts. It has separate ascent and descent paths so you don’t need to dodge people coming the other way. The sunrise hits this side of the mountain. The English signage is the best of any route. If you have any doubt about your fitness or experience, this is the right pick: the dense hut spacing means you’re never more than 30 minutes from a place to sit down, get hot food, or shelter from rain. The downsides are real. Crowds get heavy, particularly between the 7th and 8th stations and again at the final summit bottleneck. On peak Saturdays you can lose 30 minutes to standstill queueing in the dark. The descent path is loose volcanic gravel for several hours and is almost universally the part of the climb people complain about most.

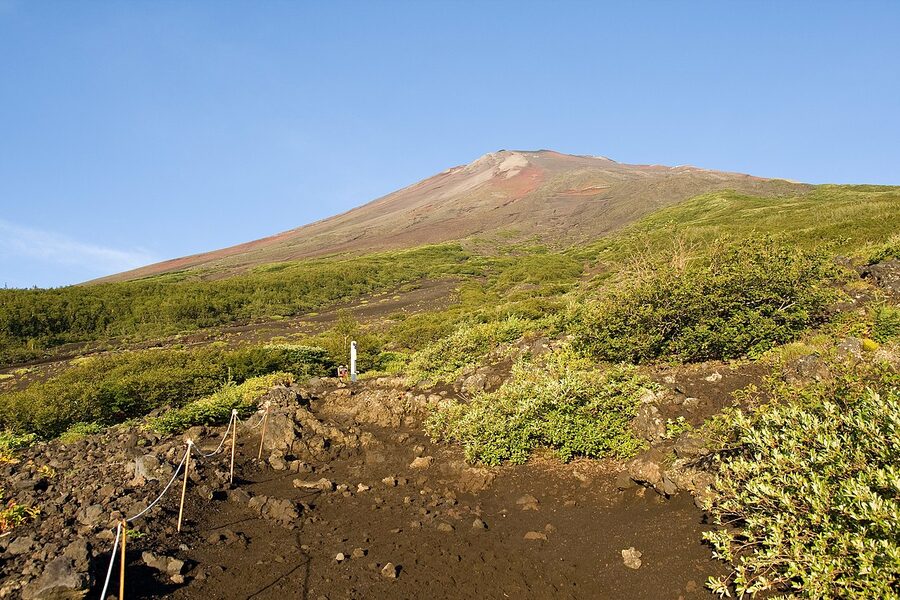
Subashiri Trail (Shizuoka side)
Start altitude 2,000 m. Ascent 5–8 hours. Descent 3–5 hours. No daily cap.
The Subashiri Trail is, for most fit climbers who don’t need the hand-holding of the Yoshida hut density, the better choice. It starts lower than Yoshida (so technically you climb more), but the first 90 minutes is through proper subalpine forest rather than open volcanic moonscape. It has dramatically fewer climbers. It joins the Yoshida Trail at the original 8th Station, so you spend the steepest, most-bottlenecked top third on the same path as everyone else, but you skip the lower-Yoshida queues entirely. The descent runs through the sunabashiri sand-run, a long volcanic-ash slope you can almost jog down: many climbers say it’s the most enjoyable part of any of the four routes. Subashiri is the route I would now recommend to anyone climbing Fuji a second time, or to a fit climber doing it the first time who wants a slightly more rugged version. The catch: fewer English signs, fewer English-speaking hut staff, and the route opening is now aligned to 1 July (matching Yoshida, since the upper sections share a trail).
Fujinomiya Trail (Shizuoka side)
Start altitude 2,400 m. Ascent 4–7 hours. Descent 2–4 hours. No daily cap.
The shortest route. The Fujinomiya 5th Station is the highest starting point of the four, so you have less elevation to climb and a shorter overall day. There are about half a dozen mountain huts on the trail. The route is popular with climbers coming up from the Tokaido Shinkansen via Shin-Fuji Station. It has two real downsides. First, you start at 2,400 m and the air is already noticeably thinner: altitude sickness rates are higher because climbers have less time to acclimatise on the way up. Second, the same trail is used for both ascent and descent, which means the upper sections feel busy in both directions and the descent on loose gravel is slow because of two-way traffic. Pick this route if you’re coming from western Japan and the access genuinely makes more sense, or if you’re tight on time. Don’t pick it because it looks shortest on paper.
Gotemba Trail (Shizuoka side)
Start altitude 1,400 m. Ascent 7–10 hours. Descent 3–6 hours. No daily cap.
The longest, hardest, and emptiest route. The 5th Station here is way down at 1,400 m. There are only about four huts on the way up, all between the 7th and 8th stations, so for the first three or four hours of climbing you are exposed and unsupported. The reward: solitude. On a clear weekday in August, you can climb the lower Gotemba route for a full hour without seeing another person. The descent uses the osunabashiri (great sand run), a 7–8 km sand-and-gravel slope that you can descend in about 90 minutes if you commit to running it. This route is for experienced hikers who are confident in their fitness and don’t need hut-density safety nets. Don’t pick it as your first Fuji.
Quick comparison
| Route | Start altitude | Ascent | Daily cap | Best for |
|---|---|---|---|---|
| Yoshida | 2,300 m | 5–7 h | 4,000 | First-timers, beginners, anyone wanting hut backup |
| Subashiri | 2,000 m | 5–8 h | None | Repeat climbers, fit hikers, forest scenery, sand-run descent |
| Fujinomiya | 2,400 m | 4–7 h | None | Climbers coming from Kansai or western Japan |
| Gotemba | 1,400 m | 7–10 h | None | Experienced hikers wanting solitude |
When to climb (and when not to)
The 2026 official season is:
- Yoshida and Subashiri trails: 1 July to 10 September
- Fujinomiya and Gotemba trails: 10 July to 10 September
Outside this window the trails are unmaintained, the huts are closed, and the rescue services are not on standby. From October to mid-June, the upper mountain is genuinely deadly: hard ice, sudden whiteouts, and avalanche risk. People die in those months attempting it without crampons and ice-axe experience. Don’t.
Within the official season, the best time to climb is mid-week in the first ten days of July or the first ten days of September. The Obon week in mid-August (around the 13th to the 16th) is the absolute peak: the Yoshida cap can be hit for several days running, and the standstill queues at the upper-mountain bottleneck become miserable. Saturday nights in late July and August are the second-worst. Avoid both if you can.
Early July has its own problem: the weather is more unstable. There can still be patches of snow on the upper Subashiri and Gotemba sections, and the rainy season has only just ended in eastern Honshu. Late August into early September is more settled but you sometimes get the front edge of typhoon-driven storms.
The single most underrated piece of timing advice: if the weather forecast for your booked night looks bad, change the date. Don’t push through. Visibility from the summit is pure lottery in a storm, and rain plus wind plus altitude plus sleep deprivation is genuinely how altitude sickness wins.
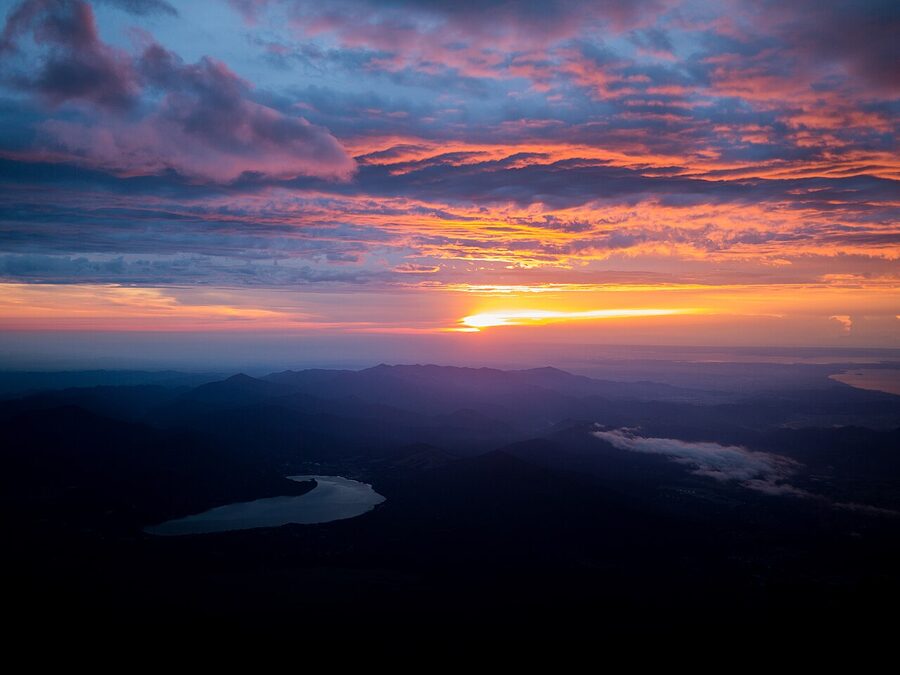
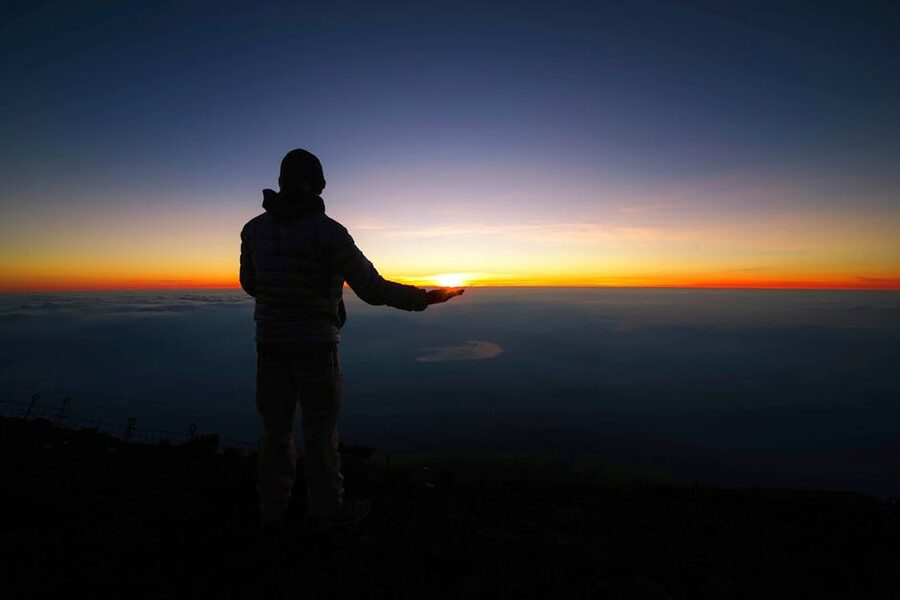
Sunrise, sleep, and the mountain hut question
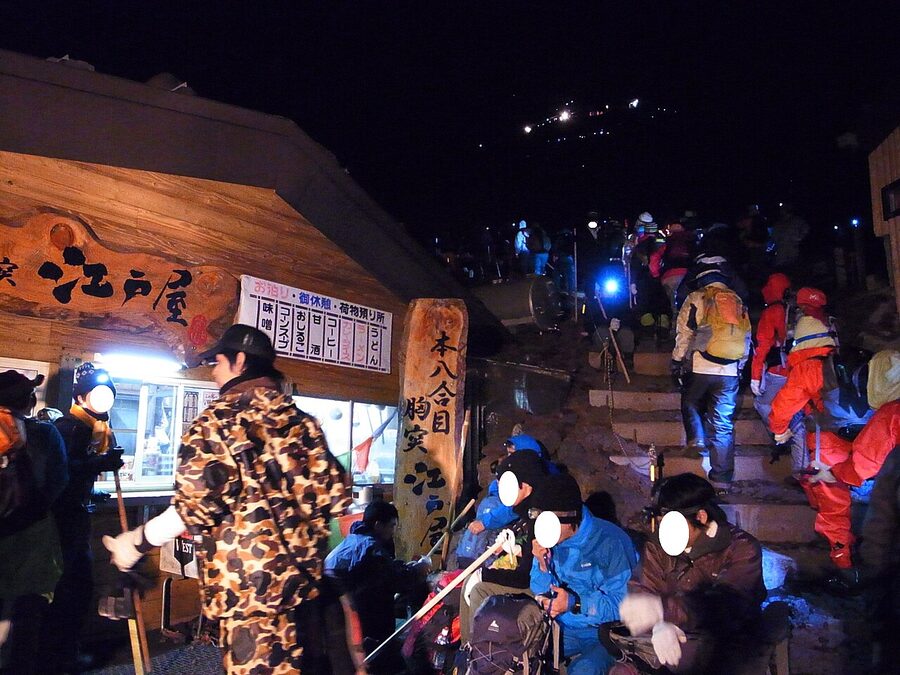
Most people climb Mt. Fuji to see goraiko, the summit sunrise. Doing this safely means a two-day climb: ascend partway on day one, sleep in a mountain hut at the 7th or 8th station, then summit before dawn on day two. In summer, the actual sunrise from the Fuji summit is between 04:30 and 05:00. Plan back from there. From an 8th-station hut at around 3,400 m, the summit takes 90 minutes to two hours, with bottlenecks in the dark. So you wake at 02:00, leave by 02:30, and that’s already cutting it fine on a busy night.
The cheaper alternative, often called “bullet climbing”, is to start late afternoon at the 5th Station, climb through the night without sleeping, summit for sunrise, then descend straight down. Local authorities discourage it strongly, the new gate-closure rules are designed to prevent it for non-hut climbers, and it is much more dangerous. Without sleep at altitude, your body’s oxygen utilisation gets worse, altitude sickness is more likely, and your risk of stumbling on the dark, loose gravel goes up. People die on the descent every year, almost always exhausted bullet climbers. Don’t do it. Book a hut.
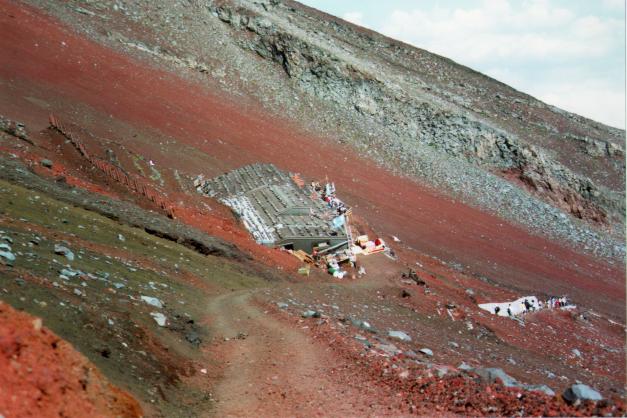
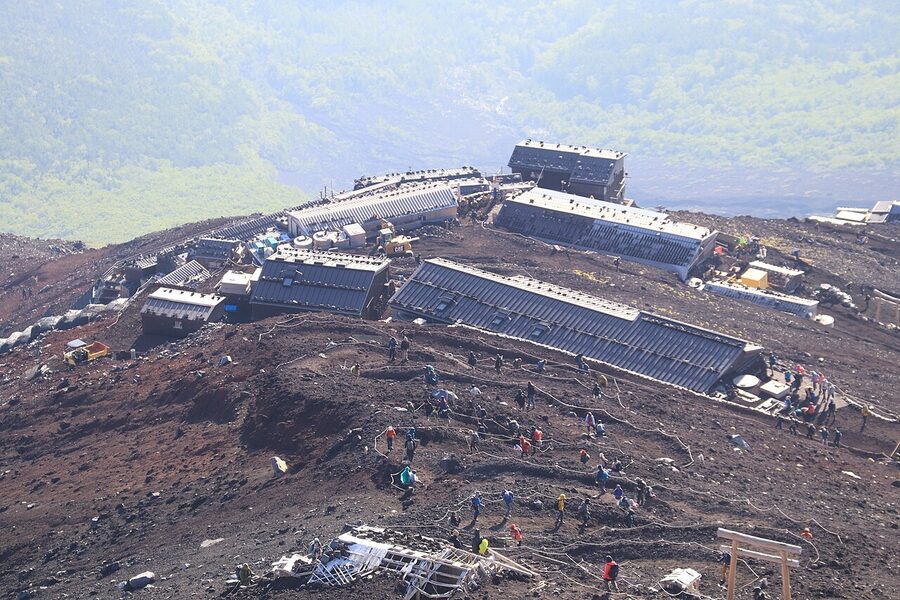
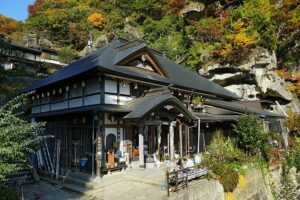
Mountain huts: the reality
Mountain huts on Mt. Fuji are not hotels. They are dormitory-style sleeping platforms with bunk-bed-sized cubbies, sleeping bags or futons provided, communal eating, paid toilets, and minimal heating. The standard plan in 2026 includes one night plus a hot dinner (often curry rice or beef bowl) and a breakfast pack. Prices on the Yoshida route currently range:
- 7th Station huts (around 2,700–2,900 m): roughly ¥12,000–14,000 with two meals.
- 8th Station huts (around 3,100–3,400 m): roughly ¥14,000–16,500 with two meals. Weekends and Obon week add ¥1,100–2,200.
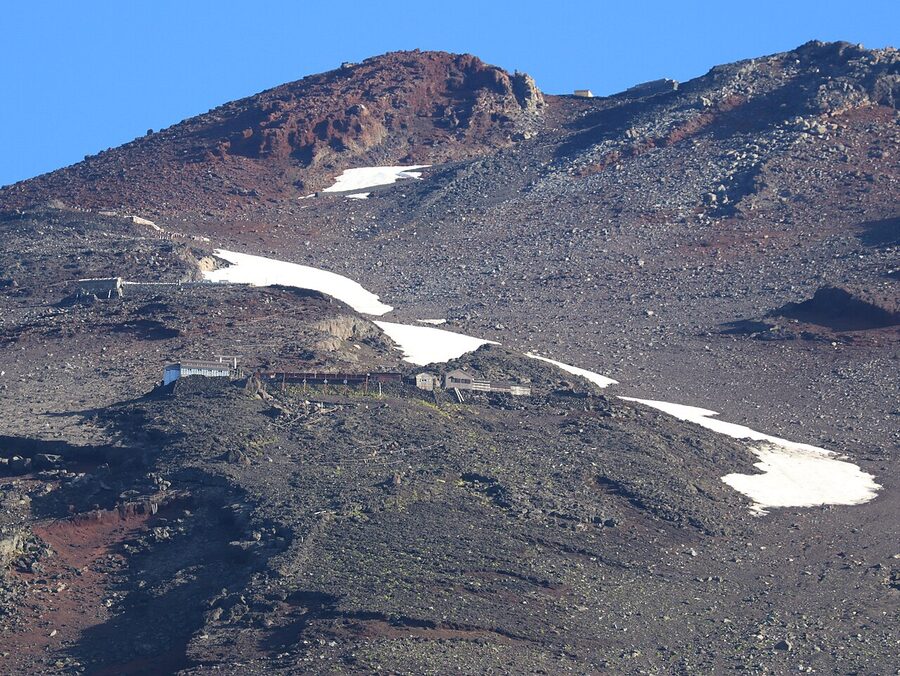
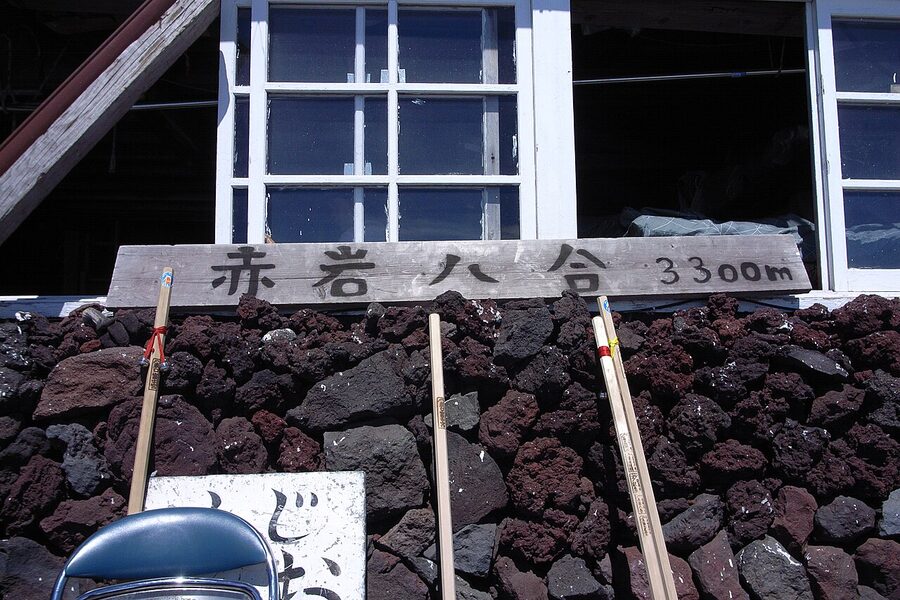
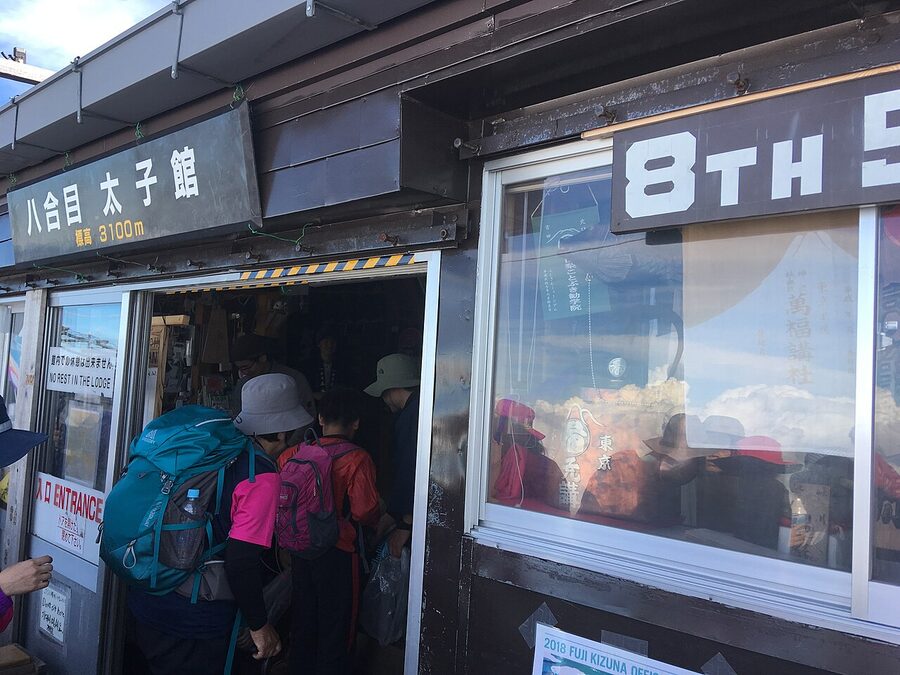
Named huts on the Yoshida route worth knowing: Taishikan at the original 8th Station, one of the oldest and most reliable; Goraikokan, the highest hut on the route at 3,450 m and named for the sunrise (goraiko-kan literally means sunrise hut); Tomoekan at the 7th Station, English-friendlier than most; Hongu chain on the original 8th Station; and Fujisan Hotel, also at the original 8th Station and one of the bigger operations. On the Subashiri route, Setokan and Mihara-shi-kan are reliable. On Gotemba, Warajikan is iconic. Reservations open online from 1 April for the Yoshida huts, which sounds early; in practice, the popular weekend slots in August are gone within two weeks. Book the moment the portal opens.
Practical hut etiquette: sandals at the door, no shoes inside, lights out at 21:00, dawn departures start at 02:00 with people moving around in headlamps. You will hear other climbers snoring. You will probably not sleep deeply. Bring earplugs. The huts are cash only at most points, including for paid toilets (200–300 yen each use), so bring a stack of 100-yen coins.
Altitude sickness, recognition, and prevention
Altitude sickness is the single most common reason climbs fail. The summit at 3,776 m has roughly two-thirds the oxygen pressure of sea level. From any 5th Station you’re climbing 1,300–2,400 m of net altitude in a single push, with limited time to acclimatise. The Japanese term is kozansyo (high-altitude sickness). The symptoms come in this order: mild headache, then nausea, then a worsening headache, then dizziness, breathlessness even at rest, and an inability to think clearly. Nothing about it is dramatic in early stages, which is exactly why people miss it.
The single most effective prevention: go slowly. Hire-a-guide companies and Japanese hiking clubs both teach the same pace, which feels frustratingly slow in the first hour and exactly right in hour four. Pause for 10 to 15 minutes at the 5th Station before you start the climb, just to let your body register the altitude. Drink water steadily, not in big slugs. Breathe deliberately. Eat something carbohydrate every hour or two even if you don’t feel hungry. If you’re sleeping at a hut, that overnight stop alone helps your body acclimatise more than any single tactic.
If you start to feel a worsening headache or nausea above the 7th Station, stop. Sit. Breathe. Take 20 minutes. Drink. Most mild cases resolve at rest. If symptoms keep worsening despite resting, the only real treatment is to descend. Don’t push for the summit. Plenty of mountain huts will give you a stretcher down to the 5th Station if you can’t walk; the cost is meaningful but you live. Bottled oxygen is available for sale at the 5th Stations and at most huts (around ¥1,400–2,000 per can) and gives you a few minutes of relief, but it doesn’t solve altitude sickness, it only buys you time to descend.
Who is at higher risk: anyone who has had altitude sickness before, anyone arriving at the trailhead exhausted from a long travel day, anyone climbing dehydrated or hungover, and anyone who started bullet-climbing at 17:00 after a day in Tokyo. Some climbers take Diamox (acetazolamide) prophylactically; consult a doctor before assuming you should.
Gear: what you actually need
The official kit list as of 2026 (per fujisan-climb.jp) is:
- Trekking shoes with ankle protection. White trainers don’t qualify on the Yoshida-route gear check.
- Cold-weather clothing: a fleece or insulated mid-layer, plus a warm layer for the summit.
- Rain gear: separate jacket and trousers (a poncho doesn’t count, the wind shreds them).
- Headlamp: with spare batteries. The pre-dawn climb is in pitch dark.
- A simple trail map: still required officially, even though you’re never alone on the trail.
What I would also bring: thin gloves (the rocky scrambles in the upper sections will skin your palms), a buff or neck gaiter (cold air at the summit), a 1.5-litre water reservoir or two 1-litre bottles (you can refill at huts but it’s pricier), high-calorie snacks for the hut night and the descent, a small first-aid pouch with painkillers (paracetamol or ibuprofen) and blister plasters, plenty of 100-yen coins for toilets, and a head-buff to keep volcanic dust out of your mouth on the descent.
What I would not bring: cotton anything (it gets wet and stays wet), big DSLR cameras (the dust on the descent ruins them, a small phone or compact does the job), full-day food supplies (huts sell hot food), and your favourite white shoes (they will be brown by hour four).
Gear rental: there are several rental shops at the Subaru Line 5th Station and a couple in Kawaguchiko town with same-day pickup. A full set of waterproof jacket, trousers, headlamp, and trekking shoes runs roughly ¥5,000–9,000 for the climb. If you’re a one-trip Fuji climber and don’t already own this kit, renting is the right call. The shops are used to it.
The descent (which is the actually hard part)
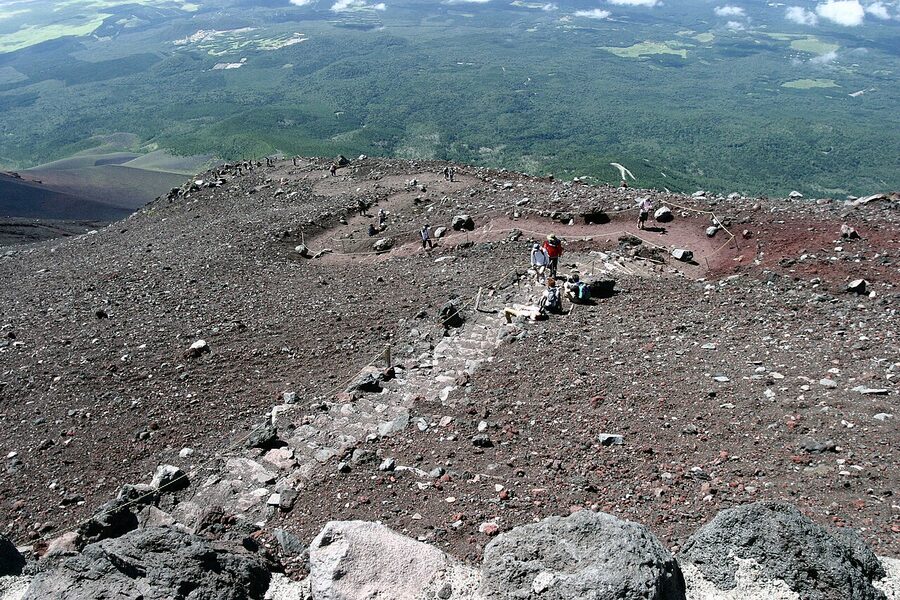
Anyone who has climbed Fuji will tell you the descent is what hurts. The trails down (especially Yoshida and Subashiri) are 6–8 km of loose volcanic gravel and pebbles on a sustained steep slope. Your knees take the load for hours. The dust gets into your shoes, your eyes, and the back of your throat. The sun comes up and there’s no shade. By the time you arrive back at the 5th Station you’ll feel worse than you did at the summit.
What helps: trekking poles (rentable at the 5th Stations), a slow steady step that keeps your feet under your hips, gaiters or even just trousers tucked into socks to keep grit out, a buff over your mouth, and frequent breaks. Don’t run the gravel unless you genuinely know what you’re doing on scree. People break ankles every season trying to bound down it.
The Subashiri and Gotemba sunabashiri sand-run descents are the exception: the volcanic ash there is much deeper and more uniform, so an experienced hiker can almost glissade down with each step sinking in. The difference is real, and it’s one of the underrated reasons Subashiri rewards a fit climber.
What it costs, end to end
A no-guide, single-night-on-the-mountain Yoshida climb in 2026, starting and ending in Tokyo, looks roughly like this:
- Climbing entry fee: ¥4,000
- Highway bus Shinjuku to Kawaguchiko + bus to Subaru Line 5th Station: ¥3,500–4,000 round trip
- Mountain hut, 8th station with two meals: ¥14,000–16,500
- Toilets (4–5 uses): ¥1,000–1,500
- Snacks, water, hot drinks on the mountain: ¥3,000–5,000
- Wooden hiking stick souvenir (optional): ¥1,500–2,000, plus ¥200–500 per hut for branding
- Bottled oxygen (optional): ¥1,400–2,000 per can
- Gear rental if needed: ¥5,000–9,000
So a single-night unsupported Yoshida climb sits around ¥30,000–40,000 per person, ex-gear. Adding a guide via Klook or Viator runs roughly ¥25,000–40,000 on top, depending on group vs private. Bus-and-tour packages from Shinjuku are typically slightly cheaper than booking the components separately because they bulk-buy hut beds.
Who shouldn’t climb Mt. Fuji
The hike isn’t technically demanding. There’s no rope work, no crampons in season, no exposure on cliff edges. But it’s long, the air gets thin, and the conditions can change abruptly. Be honest with yourself if any of the following apply:
- You’ve never hiked an 8–10 hour mountain day before in your life. Fuji is a poor introduction.
- You have heart or lung conditions affecting oxygen delivery. Talk to a doctor first.
- You’re travelling with kids under about 10. The combination of altitude, cold, and fatigue is a lot for small bodies. People do bring children, but the cancellation rate before the summit is high.
- You’re tying your trip’s success to a specific summit date. The weather will sometimes have other plans, and you should be willing to abandon.
The opposite is also true. The hike rewards people in moderate hiking shape who can put one foot in front of the other for nine straight hours, breathe slowly, and accept that there will be a section that hurts. If that’s you, book the bed and go.
The summit itself
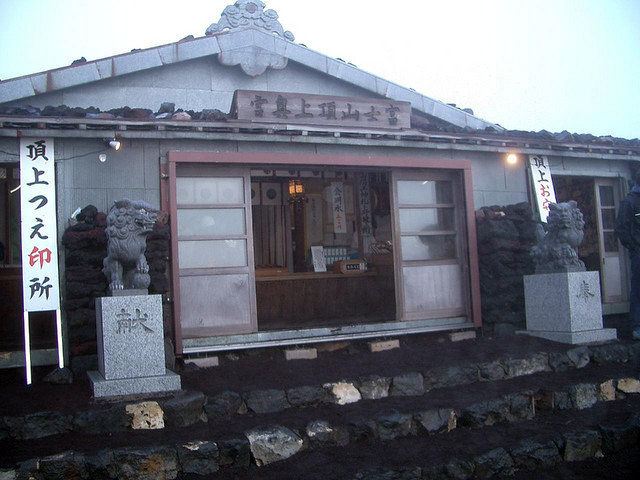
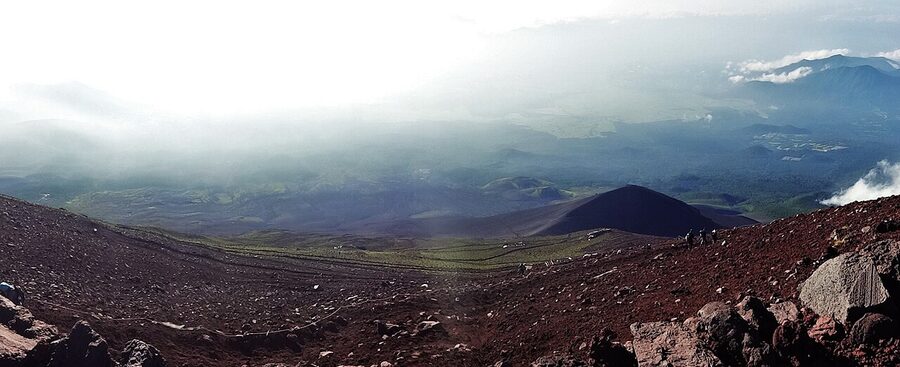
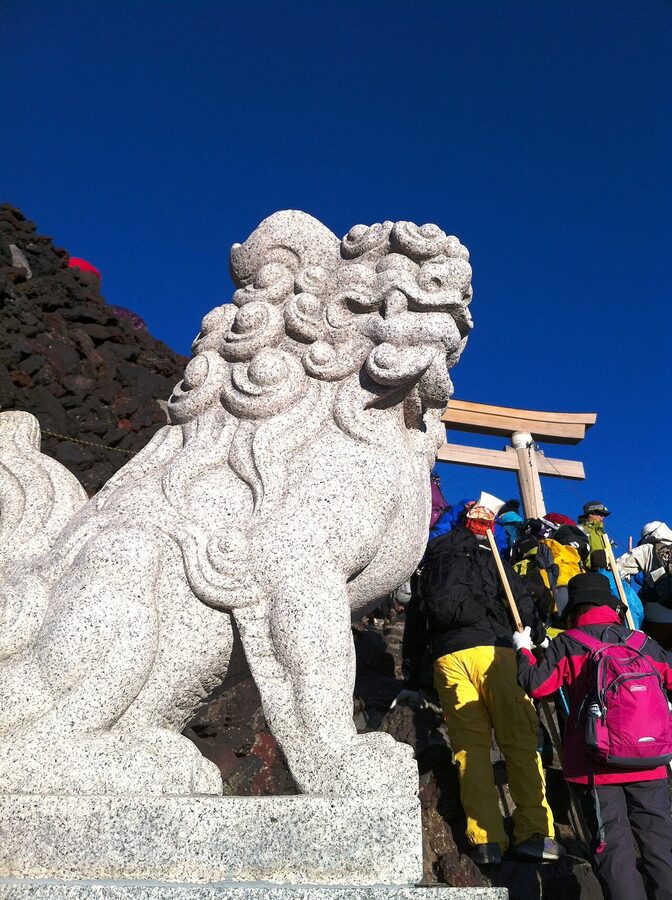
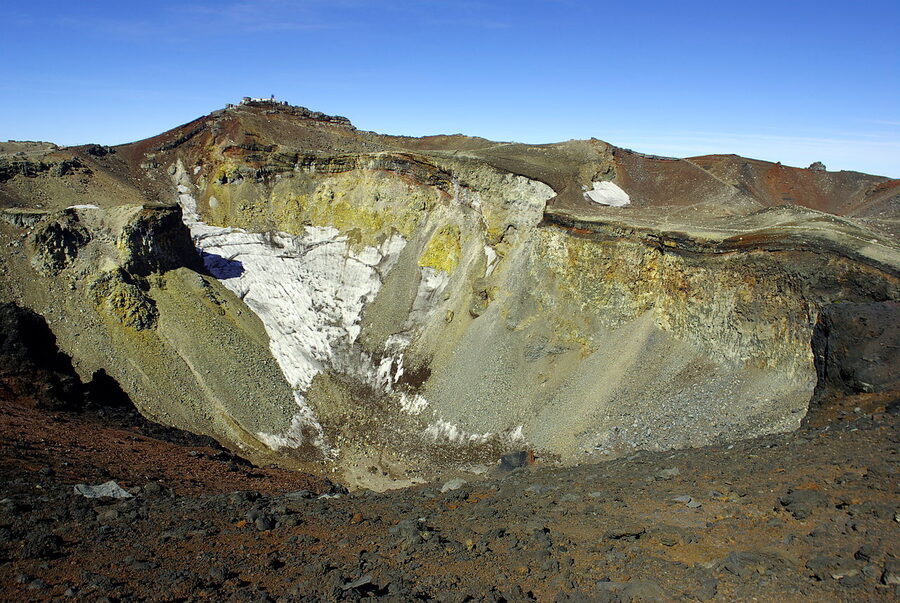
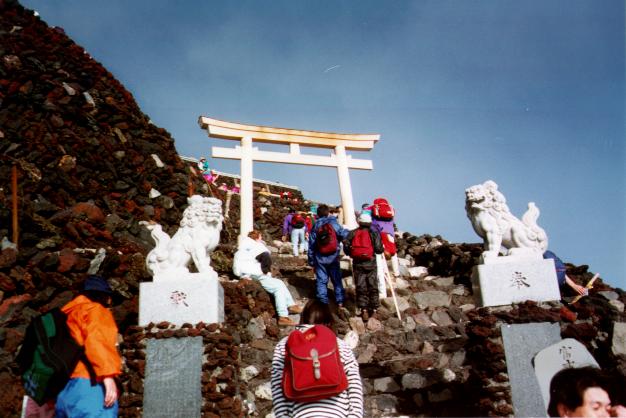
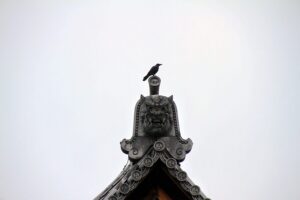
What you actually find at the summit, if the weather plays ball: a roughly oval crater rim about a kilometre across, a couple of small shrines (Kusushi-jinja on the Yoshida side, Sengen-Taisha Okumiya on the Fujinomiya side), a post office that operates only in season and will postmark a postcard for you, a closed weather observatory on the highest point at Kengamine (3,776 m), and several small huts selling instant noodles and hot drinks. The crater is a bare volcanic bowl, deeper than you expect, and on a calm clear morning you can walk the rim in 60 to 90 minutes. The actual highest point of Japan is on the south rim, opposite where the Yoshida and Subashiri trails top out. If you want the photo at the geographic summit, you have to walk over.
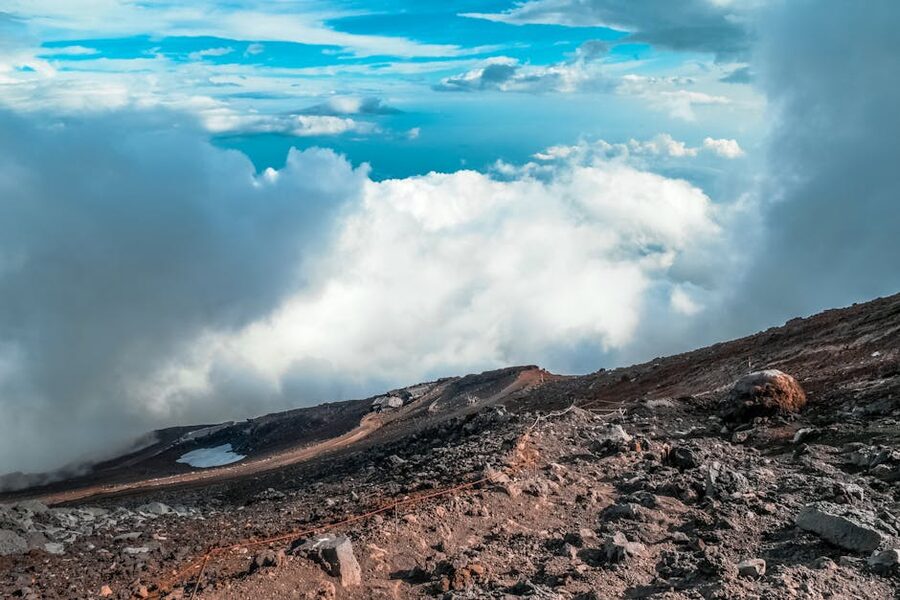
What the summit isn’t: dramatic scenery in any classical sense. It’s bare. There are no trees. The view from the rim looking outward is often a sea of white cloud sitting on top of the lower mountain, with distant peaks (the Japanese Alps to the north, sometimes Tokyo to the east) poking through. The view inward is volcanic gravel and weathered shrines. The reward of the climb isn’t the view from the top, although it’s good. The reward is doing it with everyone else who showed up: the camaraderie of the hut night, the silence at 03:00 in the dark with headlamps everywhere, the cheers when the sun finally breaks the horizon. It’s a shared experience as much as a personal one.
Getting to the trailheads
From Tokyo to the Yoshida (Subaru Line) 5th Station: the easiest is the Fujikyu Highway Bus from Shinjuku Bus Terminal direct to the 5th Station, around 2 hours 30 minutes and roughly ¥3,500–4,000 each way. Reservations open about a month ahead and the climbing-season buses sell out, especially weekends. Alternative: JR Chuo Line to Otsuki, transfer to the Fujikyuko Line to Kawaguchiko Station, then bus up to the 5th Station. Slower (about 3 hours 30 minutes) but more flexible. If you’ve planned the trip more broadly, the article on Mt. Fuji from Tokyo covers the transit options end to end.
From Tokyo to the Subashiri 5th Station: bus from Shinjuku to Gotemba Station (around 1 hour 45 minutes), then a transfer bus up to Subashiri 5th Station that runs only during climbing season.
From Tokyo to the Fujinomiya 5th Station: Tokaido Shinkansen to Shin-Fuji Station (around 70 minutes), then a climbing-season shuttle bus up to the 5th Station. Often the fastest option from central Tokyo, but the bus only runs on certain dates.
From Tokyo to the Gotemba 5th Station: bus from Shinjuku to Gotemba Station, then a climbing-season shuttle. Also accessible from Hakone, which makes it interesting if you’re combining Fuji with a Hakone day trip on either end of the climb.
Drivers note: private cars are banned from the upper toll roads to all four 5th Stations during climbing season. You park at a designated lot at the foot of the mountain and take the shuttle up.
Climbing in 2026: a planning checklist
If you’re climbing Mt. Fuji this season, here is the order to do things in:
- Pick a route. For 80% of first-timers, that means Yoshida. For repeat climbers and fit hikers wanting a quieter day, Subashiri.
- Pick a date. Avoid weekends and Obon week (mid-August). Mid-week early July or first ten days of September are the sweet spots.
- Book the mountain hut on the day reservations open (1 April). Popular Yoshida huts sell out in days.
- Book the entry slot on fujisan-climb.jp (Yoshida) or via the FUJI NAVI app (Subashiri/Gotemba/Fujinomiya). Pay the ¥4,000. Watch the safety video. Get the QR code.
- Book the highway bus seat from Shinjuku, or the shinkansen leg if you’re going via Shin-Fuji.
- Pack the kit list. If you don’t have it, rent at the 5th Station on arrival.
- Arrive at the trailhead by early afternoon on day one. Acclimatise at the 5th Station for at least 90 minutes. Eat. Hydrate. Start climbing in the late afternoon for an early evening hut arrival, or earlier if you’re going to a 7th Station hut.
- Sleep what sleep you can. Wake by 02:00. Climb to the summit for sunrise.
- Walk the crater rim if the weather holds. Descend on the matching trail back to the 5th Station.
- Bus or shuttle back to Tokyo, eat well, sleep deeply, and accept that your knees will be unhappy for three days.
The full Mt. Fuji regional guide covers what else is worth doing in the Fuji Five Lakes area on the day before or after the climb (Chureito Pagoda for the photo, Lake Kawaguchi for a quieter morning, Oshino Hakkai for the spring water). If you have an extra day, that combination beats spending two nights in Tokyo before the climb.
The proverb is wrong, by the way. A wise man climbs Mt. Fuji once. A wiser one climbs Subashiri the second time, in the first week of September, on a weekday, with a hut booked at the original 8th Station and the bus seats reserved a month ahead. That climb is the better climb.
.jpg)
.jpg)
.jpg)
_Climb_Mt.Fuji(Yoshida_Trail).jpg)
.jpg)
_01.jpg)